-
Remove all hot links. Highlight word and select "Unlink"
Replace all images
- Review and updated as needed
...
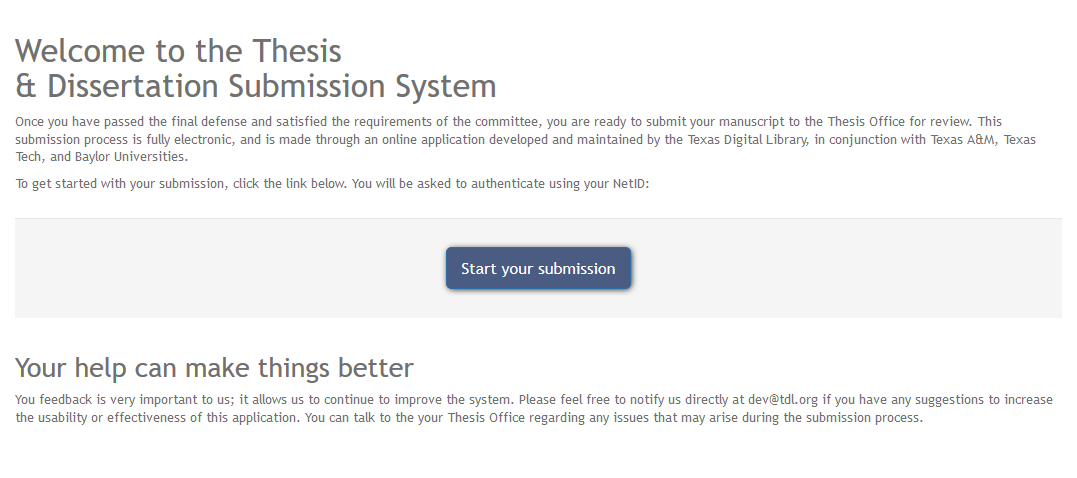
Generally, students begin their submission on the Vireo welcome screen (shown below). The Vireo welcome screen will be found at the following URL: https://[name of your institution]-etd.tdl.org/. For example, https://utexas-etd.tdl.org/. To begin, click START YOUR SUBMISSION.

Students using a TDL-hosted Vireo installation will be taken to the login screen for their institution. (See article on Shibboleth authenticationAuthentication for more information about configuring Vireo with Shibboleth.)
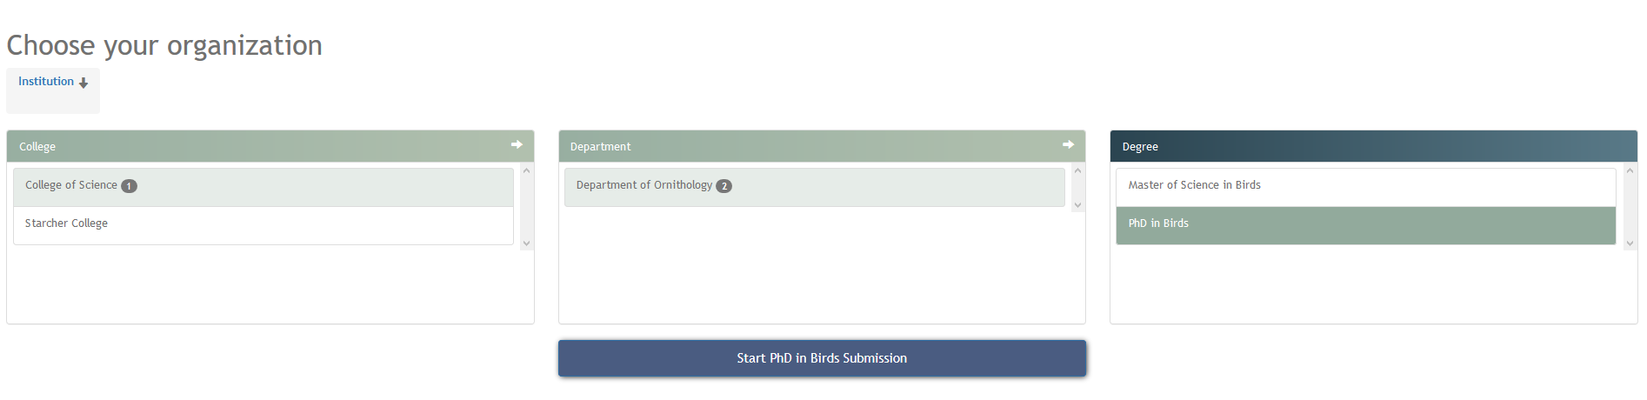
Choose Your Organization
Once a student has clicked "Start your submission," they will be directed to a page that asks them to choose from several submission options. These options (why may include College, Degree, Department, Major, Program, Administrative Group, and System) are determined by the institution. (See article on Organization Settings for more information on setting up these options and customized workflows). Once the student has chosen their organization, they should click the "Start Submission" button.
Step 1:
...
Personal Information
Once logged in, students will start the 5-step submission process, beginning with Step 1: Verify Your Personal Information.
Some If the student logged in with Shibboleth, some fields on this screen will be auto-populated with information stored with the student’s login information, as seen in the image below. These auto-populated fields are not editable by the student; however, Vireo Reviewers and Managers are able to edit these fields once the submission is in the system. If the student does not login with Shibboleth, they will have to enter all fields manually.

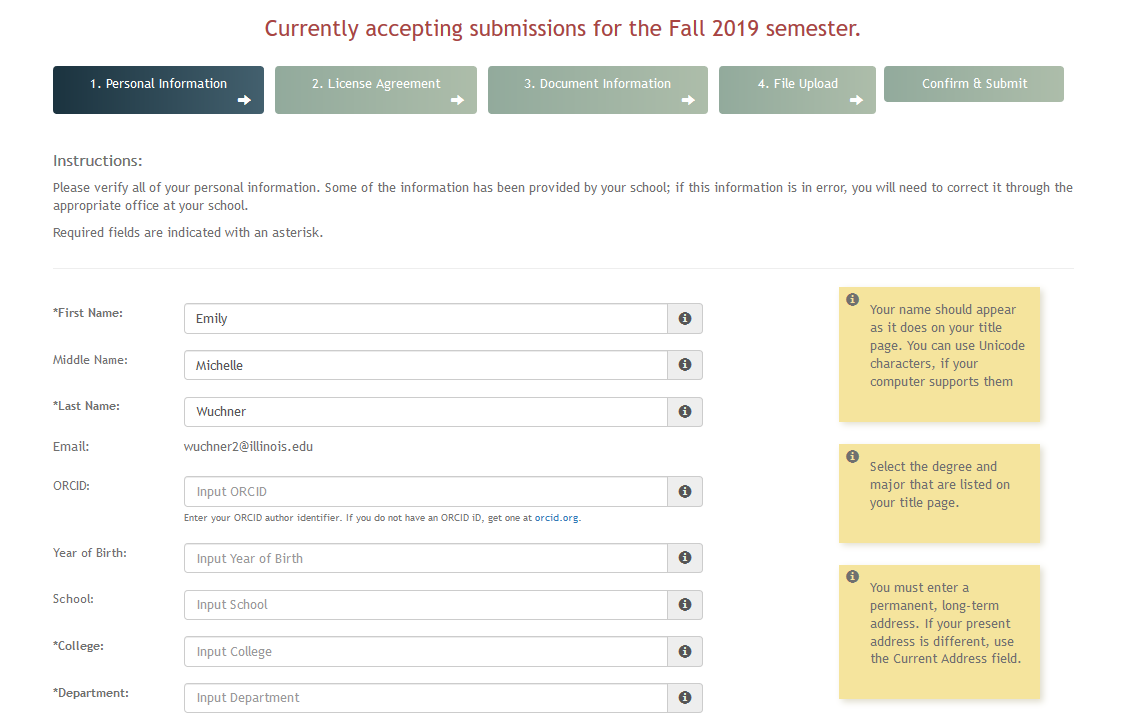
Students should fill out the remaining fields on the “Verify Your “Personal Information” page.
Fields marked with an asterisk are required. If a student fails to fill out a required field, he/she will get an error message when trying to move to the next stepon the "Confirm & Submit" page. They will be unable to submit their thesis or dissertation until these errors are addressed.
Help info
Instructions for filling out the forms throughout the submission process are found in the yellow “sticky notes” in the right margin of each screen. (These sticky notes are editable in the Administrative interface for Vireo. See the Organization section for more information.)
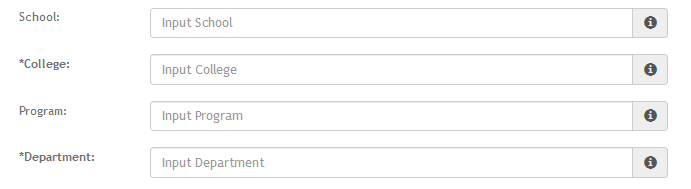
Additional help about each field can be found by hovering over the information icon to the right of each input box. (See below.) This help text is also editable in the Submission Settings for Organization section of Vireo.

When done with the “Verify Your “Personal Information” screen, students should click SAVE AND CONTINUE "Continue to License Agreement" at the bottom of the screen.
Once a student clicks SAVE AND CONTINUE, he or she can close the submission and come back to it later, with any entered information having been saved. If a student leaves this page before clicking SAVE AND CONTINUE, his or her work will be lostVireo automatically saves the information the student enters into their submission. If they skip ahead in the submission process or logout and continue their submission later, their information will be saved.
Step 2: License Agreement
...
Vireo provides a default license agreement. However, this agreements agreement is editable in the Vireo Application Settings. You may choose to add additional license agreements (such as for publication in Proquest) in the Vireo Application Settings.
Students can indicate their agreement with the license by clicking the checkbox and then clicking SAVE AND CONTINUE.
Note: If a student fails to click the license checkbox, he/she will get an error message when trying to move to the next stepon the "Confirm & Submit" page. They will be unable to submit their thesis or dissertation until these errors are addressed.
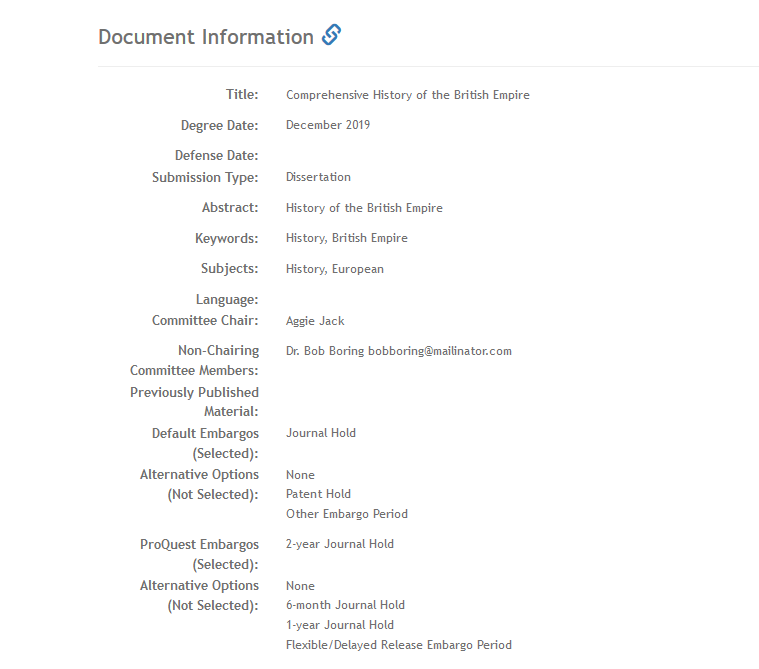
Step 3: Document Information
...
To expand the Abstract field, click on the triangular cluster of dots in the bottom right corner of the field and drag it to increase the size of the box.
Committee Members
Depending on how the Committee Members fields are set up in the Configurable Settings, students may select the role of each committee member from the Roles dropdown menu. These roles are customizable in the Configurable Settings.Students have a default of four slots for committee members but may add more by clicking ADD ADDITIONAL MEMBERS.Vireo has a blank where students can enter the Committee Chair's name and email address. This information can be entered manually by the student or selected in a drop-down menu if a controlled vocabulary list has been uploaded (see the article on Controlled Vocabulary Management for information on uploading controlled vocabulary lists). If the name is selected from the drop-down list, the email address will auto-populate. Students may enter the names and email addresses for additional Non-Chairing Committee members in the blank below. By default, Vireo includes one blank for Non-Chairing Committee Members, but this number can be adjusted by using the plus and minus buttons to the side.

Previously Published Material
If the student has previously published material, they must indicate this by clicking on the box next to PREVIOUSLY PUBLISHED MATERIAL. They then must identify the published material in the box that appears.
Embargo Options
Depending on how Configurable Settings are set up, students Students will have the option to select a temporary or permanent an embargo on the publication of their theses and dissertations. These embargo types are fully customizable in the Configurable Settings of VireoYou may control the embargoes offered and their duration through the Workflow Management section.
Faculty advisors will can be given the chance to approve or reject the embargo option selected by students.
To proceed to Step 4, students will click SAVE AND CONTINUE."Continue to File Upload."
Step 4: File Upload
...
In this step, students upload their theses and dissertations. Depending on how the Vireo Submission Settings are configured, students may also be asked to upload:
...
Requiring students to submit the above file types is optional, and can be configured in the Submission Workflow Management Settings.
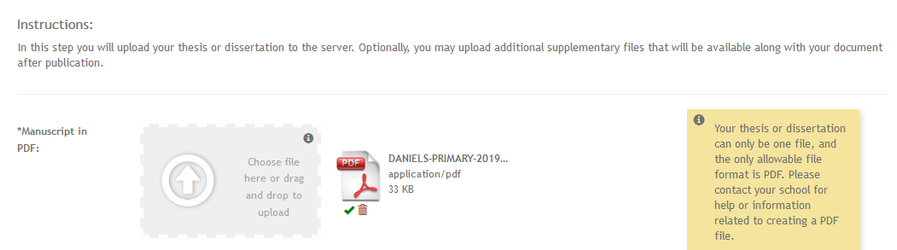
Upload the Primary Document
To upload the primary manuscript, click BROWSE and navigate to the document.

Next, double click on the document or click openstudents may click the box to browse for their document file. Alternatively, they may drag and drop their file in the box. This box will only accept PDF files; if a student tries to submit a different file type here, they will get an error message.
Click UPLOAD.
Vireo will assign a new file name to the document as shown below. Students have the option at this point of replacing the document with a new file by clicking REPLACE MANUSCRIPT and uploading a the trashcan beneath the file. A message will appear asking them to confirm that they would like to upload different file.

Upload Additional Files
To upload additional files, select the type of document from the “Additional Documents” dropdown menu.

Next click BROWSE, navigate to the document and click OPEN.students may click the box to browse for their document file. Alternatively, they may drag and drop their file in the box.

Click UPLOAD.
Click SAVE AND CONTINUE "Continue to Review" to move on to Step 5.
Step 5: Confirm & Submit
In the final step of the submission process, students are asked to review the information and files provided in the previous steps.
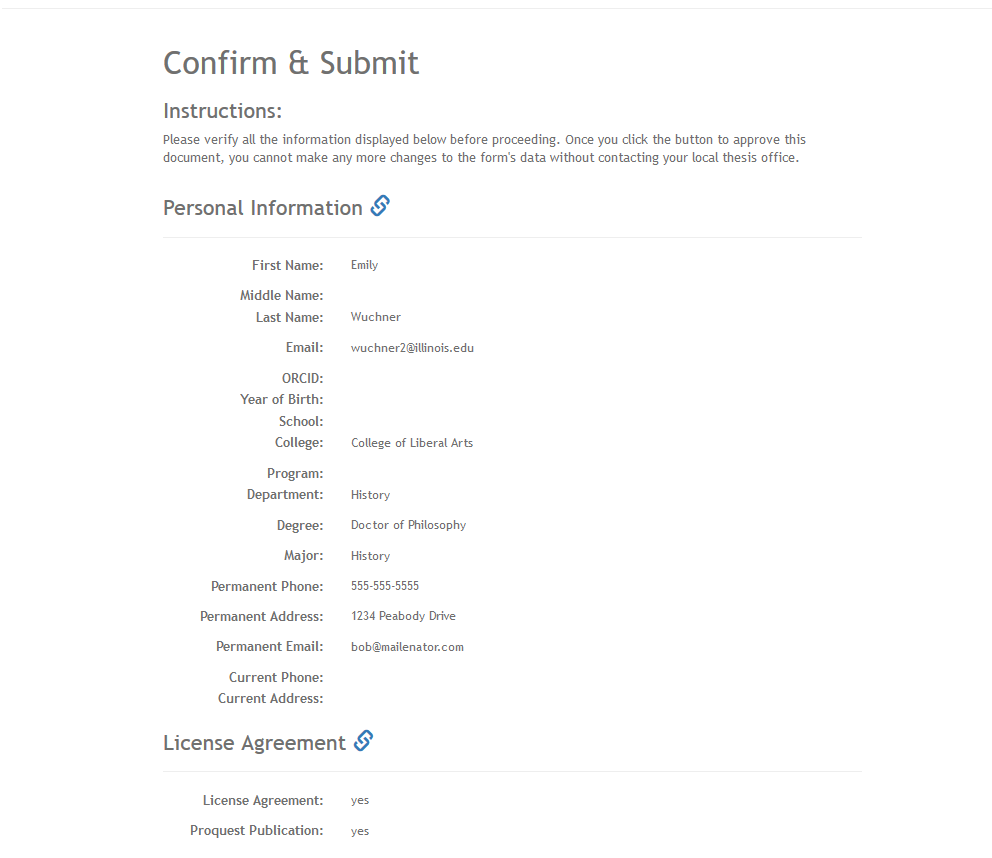

Students have the ability at this point to edit any of the fields or replace any documents by clicking on the “edit” links at the bottom of each section of this screenblue symbols next to each stage heading. Any required fields that have not been filled out will appear in red. By clicking "fix," students will be taken back to that page where they can enter the required information.
Students may also return to any step in the submission process by clicking on the arrows at the top of each screen.


Once all information is verified, students should click CONFIRM AND SUBMIT to complete the process.
They will then see a “Submittal “Submission Complete” screen.
This screen shows a message from the graduate office that is customizable in the Theme Settings.

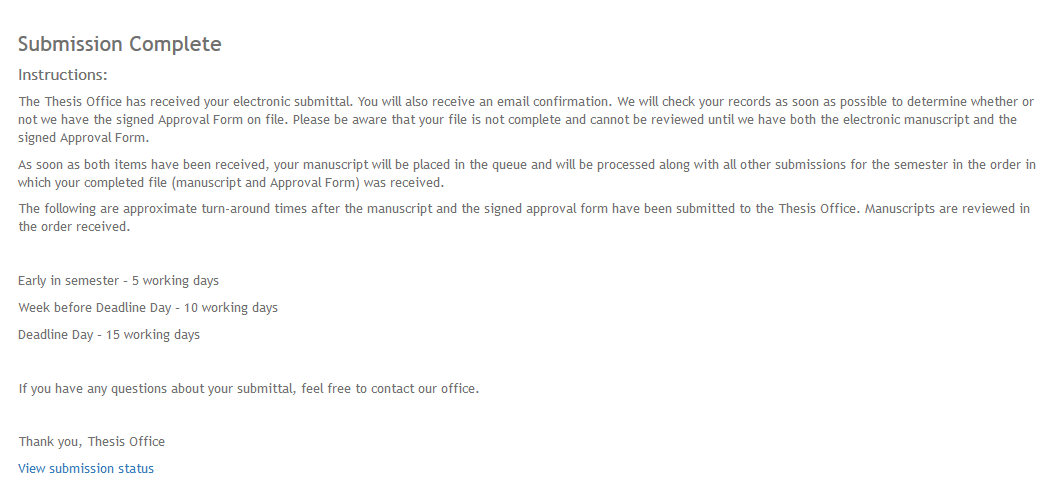
Students may view the submission’s status by clicking on VIEW SUBMISSION STATUS.
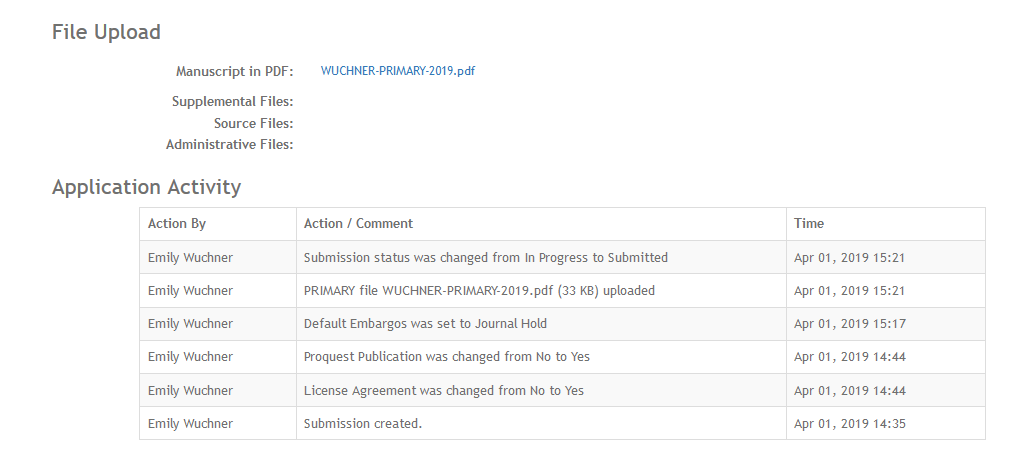
Students can see all of the submission information…


…including an activity log listing any actions taken on their ETD.