Manage Workflow
- Stephanie Larrison (Unlicensed)
- Courtney C. Mumma
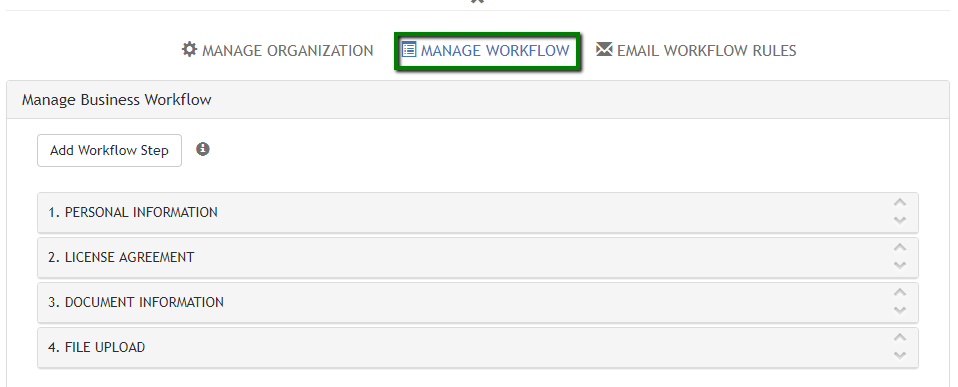
MANAGE WORKFLOW, the middle section of the the bottom area, is where custom workflows are created.
By default the steps, or tabs in the student submission, are PERSONAL INFORMATION, LICENSE AGREEMENT, DOCUMENT INFORMATION, and FILE UPLOAD. More can be added and any default step can be deleted. If desired, the order of the steps can be changed using the arrows on the far right of each label.
Editing Workflow Steps
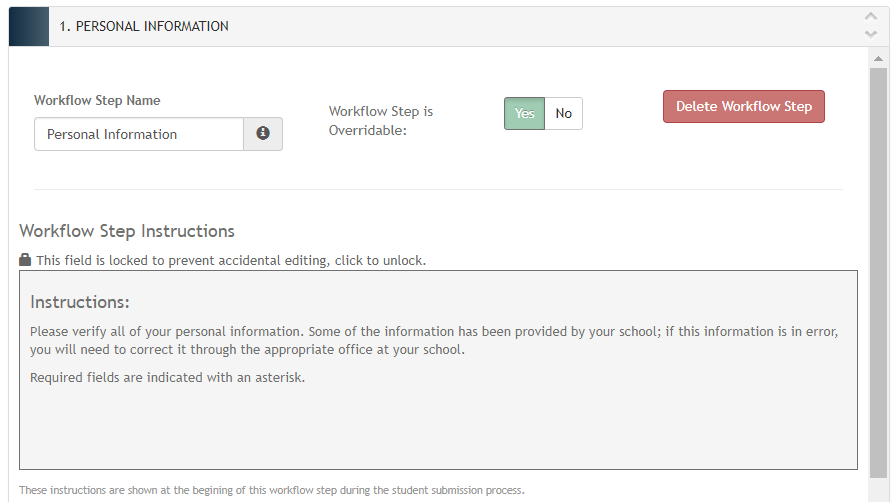
Click on names of the step to expand the accordion view of the Workflow Step. In the example below, the Workflow Step for Personal Information has been selected.
Each Workflow Step has the same options listed at the top:
- "Workflow Step Name" is the tab or page heading as displayed in student submission view.
- "Workflow Step is Overrideable" is an advanced feature associated with Hierarchical Organization Management which should be used with caution. See OVERRIDE for more information.
- "Delete Workflow Step" is an advanced feature which should be used with extreme caution. The only way to get back a deleted workflow step is to Sync the workflow with the Parent. This overrides ALL changes so that the entire workflow will need to be recreated, not just the step that was deleted.
- "Workflow Step Instructions" appear at the top of each step in the student submission view.
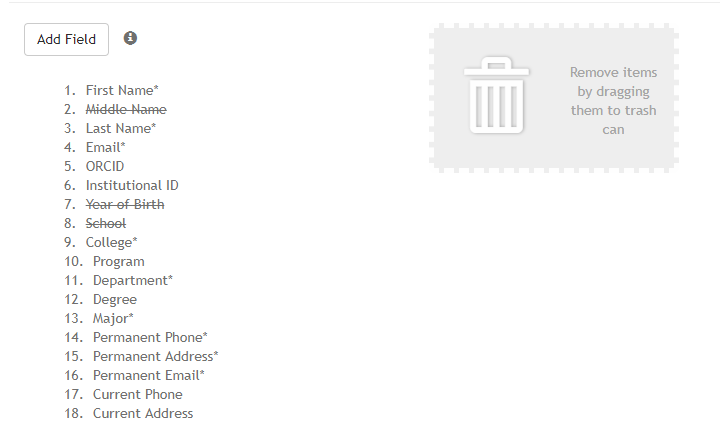
A list of fields is in the middle of each Workflow Step. Fields marked with an asterisk * are required, and those with a strikethrough are disabled. Any field can be required, optional, disabled or hidden. Disabled fields are not visible by students or staff, whereas hidden fields are not visible to the student, but they are active fields in the staff view. Please see the separate instructions for managing Field Profiles.
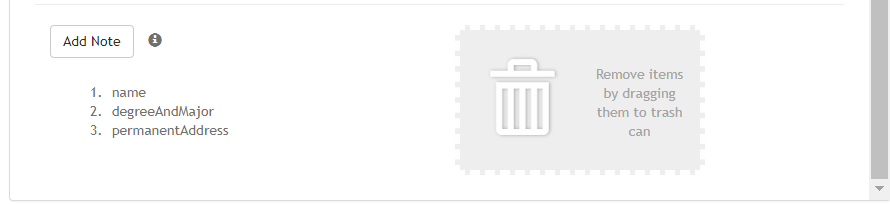
At the bottom of each Workflow Step, the yellow 'sticky' notes that appear in the student submission steps can be created, edited, reordered, or deleted.