Setting up the Sync Tool
DuraCloud@TDL Setup
Introduction
The TDL runs its own DuraCloud hosting, independent of the DuraSpace organization; however, TDL works closely with the DuraSpace team and community so that our services align and support each other's sustainability and innovation. This guide can be used by those TDL members who have opted to use any of the TDL Digital Preservation Services. DuraCloud@TDL is the gateway to all of the TDL preservation storage options. The TDL team will help users set up their DuraCloud@TDL account, username(s), and assign the proper permissions before they begin.
DuraCloud supports uploading files through file selection or drag-and-drop via the web-based DuraCloud administrative interface (dashboard). However, this method requires you to initiate the upload for each file or set of files every time you would like to update them. Also, this web-based method does not allow you to upload whole directories at a time. Instead, TDL recommends using the DuraCloud Sync Tool. This application allows you to continuously copy files from any number of local folders to a DuraCloud space. As you add, update, and delete files locally these changes can be automatically propagated to the cloud. You can use the tool in two different modes: GUI mode or via a command-line interface. TDL users will need to install the Sync Tool locally and configure it for their needs.
Configure DuraCloud@TDL
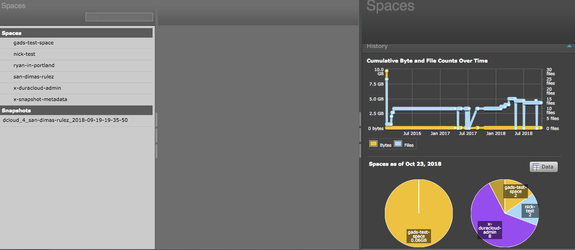
You may wish to define different spaces in your DuraCloud dashboard. You can think of spaces as essentially directories in your dashboard, and they must be created prior to syncing content from the command line or sync tool. You can have one space to which you upload content every time, or many different spaces for each upload.
Download and configure sync tool
Content can be added to DuraCloud spaces via the sync tool, which can be installed from DuraSpace here. The DuraCloud sync tool can be run through a GUI or the command line; these instructions will proceed using the GUI.
Command line instructions are here. The Sync Tool GUI in the browser was designed to only sync data with spaces in the primary storage provider. The Sync Tool on the command-line does have the ability to sync to spaces in any of the storage providers (primary and any secondaries). If you run "java -jar duracloudsync-x.y.n.jar --help" (x.y.n = current version) on your command line you'll see all of the options for the command. The Sync Tool documentation (https://wiki.lyrasis.org/display/DURACLOUDDOC/DuraCloud+Sync+Tool+-+Command+Line#DuraCloudSyncToolCommandLine-UsingtheSyncTool) has some good examples of commands that allow you to specify a storage provider and space when syncing data. G
For Chronopolis Sync Tool Setup
- Configure Sync Tool
- Information about the Sync Tool configuration can be found here: https://wiki.duraspace.org/display/DURACLOUDDOC/DuraCloud+Sync+Tool
Click Edit and enter your hostname (institution-dcloud.tdl.org), and account information (DuraCloud username and password)
- Select Space - This is the space you created in the DuraCloud dashboard where your content will be ingested
- Add the directory you wish to Sync. This will be a folder, and when you select it, you will only sync everything BELOW the folder level to the space you created - see instructions for configuring Folder structure for upload folder if this is not ideal for your workflow
Set Run Mode (bottom panel) to Single Pass
Update Policy
Overwrite existing content - (Recommended for Chronopolis users) This is if you want to overwrite an existing content in this space with any changes every time you upload. For Chronopolis, you will notice that the Space is emptied every time the snapshot to Chronopolis has completed, so this is kind of happening anyway. This option ensures if you're transferring content to the space and the operation is interrupted for any reason, the next time you run the SyncTool, it will overwrite any files that may not have transferred completely or correctly with the correct version on local disk.
- Do not sync updates - This turns off the syncing function entirely, for any files that already exist in DuraCloud. So every time you sync from this folder, it's just adding content and not updating or renaming anything.
- Update but do not overwrite (preserve original in cloud)- This is if you want the tool to sync and recognize changes to the files and ingest updates, but the original uploads would stay put in storage. If there is a changed version of a file, the name would be adjusted to reflect that it's a different version.
- Check the Jump Start box to Accelerate initial upload of files with jump start
Syncing content to DuraCloud with meaningful folder depths and filenames
Deciding how to sync directories to DuraCloud is an important step. You may wish to have a directory structure with a minimum depth of two levels inside the synced folder since it will allow you to see a deeper and more meaningful directory hierarchy in the DuraCloud dashboard. To retain hierarchical information in your filenames, you can either create at multiple folder depths for syncing or use the DuraCloud prefix option. If the order and intellectual context of your content and/or its placement in your original filesystem is essential to its authenticity over time, these instructions will help reflect that.
- See DuraCloud Best Practice here