Creating a Dataverse collection
- Courtney C. Mumma
- tdr-steering
- Caleb Holland (Unlicensed)
- Matthew Mceniry (Unlicensed)
2.1. Creating a Dataverse collection
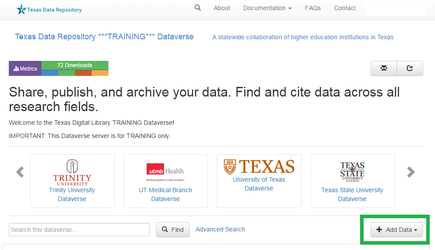
1. Once you are logged in, click on the "Add Data" button IN YOUR OWN INSTITUTIONAL DATAVERSE COLLECTION and in the drop-down menu select "New Dataverse" (collection).
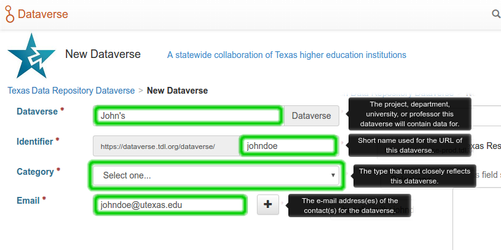
2. Once on the "New Dataverse" (collection) page, fill in the following fields:
- Name: Enter the name of your Dataverse collection.
- Identifier: This is an abbreviation, usually lowercase that becomes part of the URL for the new Dataverse collection. Special characters (~,’,!,@,#,$,%,^,&, and *) and spaces are not allowed. Note: if you change the Dataverse collection URL field, the URL for your Dataverse collection changes (http://…/’url’), which affects links to this page.
- Email: This is the email address that will be used as the contact for this particular Dataverse collection. You can have more than one contact email address for your Dataverse collection.
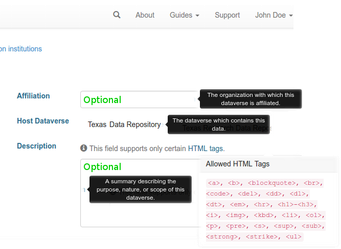
- Affiliation: Add any Affiliation that can be associated to this particular Dataverse collection (e.g., project name, institute name, department name, journal name, etc.). This is automatically filled out if you have added an affiliation for your user account.
- Description: Provide a description of this Dataverse collection. This will display on the homepage of your Dataverse collection and in the search result list. The description field supports certain HTML tags (<a>, <b>, <blockquote>, <br>, <code>, <del>, <dd>, <dl>, <dt>, <em>, <hr>, <h1>, <h3>, <i>, <img>, <kbd>, <li>, <ol>, <p>, <pre>, <s>, <sup>, <sub>, <strong>, <strike>, <ul>).
- Category: Select a category that best describes the type of Dataverse collection this will be. For example, if this is a Dataverse collection for an individual researcher's datasets, select Researcher. If this is a Dataverse collection for an institution or unit, select Organization & Institution.
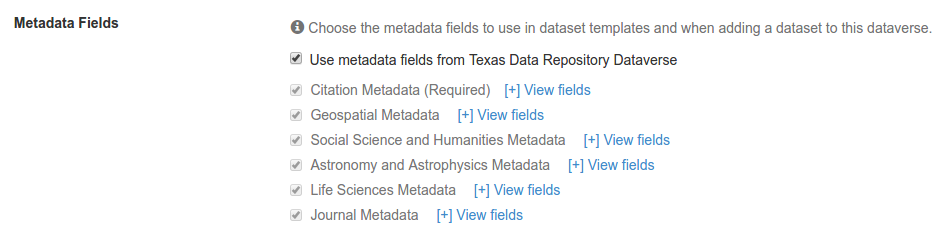
- Choose the sets of Metadata Elements for datasets in this Dataverse collection: by default the metadata elements will be from the host Dataverse collection that this new Dataverse collection is created in. The Dataverse software offers metadata standards for multiple domains.
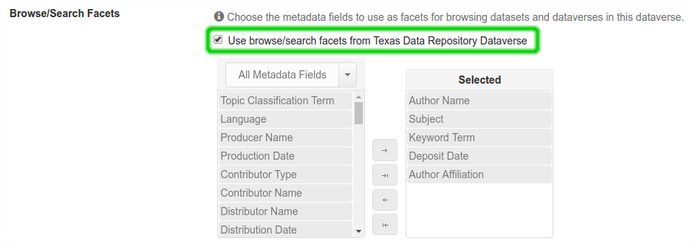
- Select facets for this Dataverse collection: by default the facets that will appear on your Dataverse collection landing page will be from the host Dataverse collection that this new Dataverse collection was created in. The facets are simply metadata fields that can be used to help others easily find Dataverse collections and datasets within this Dataverse collection. You can select as many facets as you would like.
3. Selected metadata elements are also used to pick which metadata fields you would like to use for creating templates for your datasets. Metadata fields can be hidden, or selected as required or optional. Once you have selected all the fields you would like to use, you can create your template(s) after you finish creating your Dataverse collections.
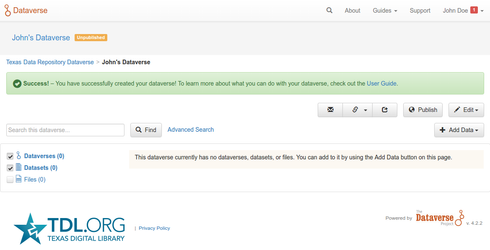
4. Click "Create Dataverse" (collection) button and you're done!
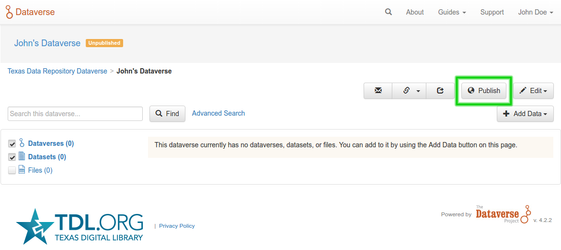
5. Once your Dataverse collection is ready to go public, go to your Dataverse collection page, click on the "Publish" button on the right hand side of the page. A pop-up will appear to confirm that you are ready to actually Publish, since once a Dataverse collection is made public, it can no longer be unpublished. Note: a Dataverse collection must be published before a dataset within that Dataverse collection can be published.
*Required fields are denoted by a red asterisk.
2.2. Preparing Data, Code, and Additional Information
Researchers can deposit a wide variety of data and related electronic materials to the Texas Data Repository, including spreadsheets, sensor and instrument data, surveys, GIS data, and imagery, along with associated material such as codebooks or data dictionaries. Any individual file uploaded to the repository must be under 4GB, though any uploads over 2GB, and some below that threshold, may be slow or stall due to variables outside of TDL's control. Please email support@tdl.org if you having trouble uploading files. If you have files over 4GB, we will consider support options on a case by case basis and in consultation with your Institutional TDR liaison.
If your data requires special instructions, disclaimers, field definitions, etc., please prepare a README.txt file to accompany your data files. (See Georgia Tech's README template)
2.3. Creating Metadata
During the upload process, the Dataverse software will require certain metadata fields describing your dataset be completed. It is recommended to prepare metadata prior to upload, in order to resolve any questions that may arise during the upload process regarding how to populate the required and optional fields. Important: metadata is the primary means by which your data become discoverable and usable to end users, as it provides descriptive terms for search engines to match to end-user search terms, and provides valuable context and information about how, where, when, and for what purpose your data were created for downstream users exploring your data for the first time. Making data discoverable and usable to end users increases data citations (Gleditsch, Metelits & Strand, 2003; Piwowar, Day & Fridsma, 2007; loannidis et al., 2009; Pienta, Alter & Lyle, 2010; Henneken & Accomazzi, 2011; Sears, 2011; Dorch, 2012; Piwowar & Vision, 2013).
Below are the required Metadata fields for Dataset upload (hover over field names on the form to display more information):
- Title: Full title by which the Dataset is known.
- Name (Author): The author's Family Name, Given Name, or the name of the organization responsible for this Dataset.
- Format: Personal name expressed as Last Name, First name, Middle Initial. Organizational name as it appears. Examples:
- Obama, Barack H.
- Texas Digital Library
- Format: Personal name expressed as Last Name, First name, Middle Initial. Organizational name as it appears. Examples:
- Contact with email: The email address(es) of the contact(s) for the dataset. This will not be displayed to the user.
- Description (Text): A summary describing the purpose and scope of the dataset.
- Date: In cases where a dataset contains more than one description (for example, one might be supplied by the data producer and another prepared by the data repository where the data are deposited), the data attribution is used to distinguish between the two descriptions. Date expressed in ISO format (YYY-MM-DD). Example: 2016-01-30
- Subject: Domain-specific-Subject Categories that are topically relevant to the dataset.
- Production Date: Date when the data collection or other materials were produced (not distributed, published, or archived). Date expressed in IOS format (YYY-MM-DD). Example: 2016-01-30
- Production Place: The location where the data collection and any other related materials were produced.
- Kind of Data: Type of data included in the file. Formatted as free text.
- Examples:
- survey data
- census/enumeration data
- aggregate data
- clinical data
- event/transaction data
- program source code
- machine-readable text
- administrative records data
- experimental data
- psychological test
- textual data
- coded textual
- coded documents
- time budget diaries
- observation data/ratings
- process-produced data
- Examples:
Other fields (not required). Please refer to the Texas Data Repository Metadata Guidelines for the definitions of each term:
- Keywords
- Notes
- Depositor
- Deposit Date
- Related Publication Metadata
- Citation
- ID Type
- ID Number
- URL
- Notes
- Language
Related articles